
How to Fix Driveway Cracks: DIY Tips, Professional Solutions, and Prevention
DIY Driveway Crack Repair: Step-by-Step
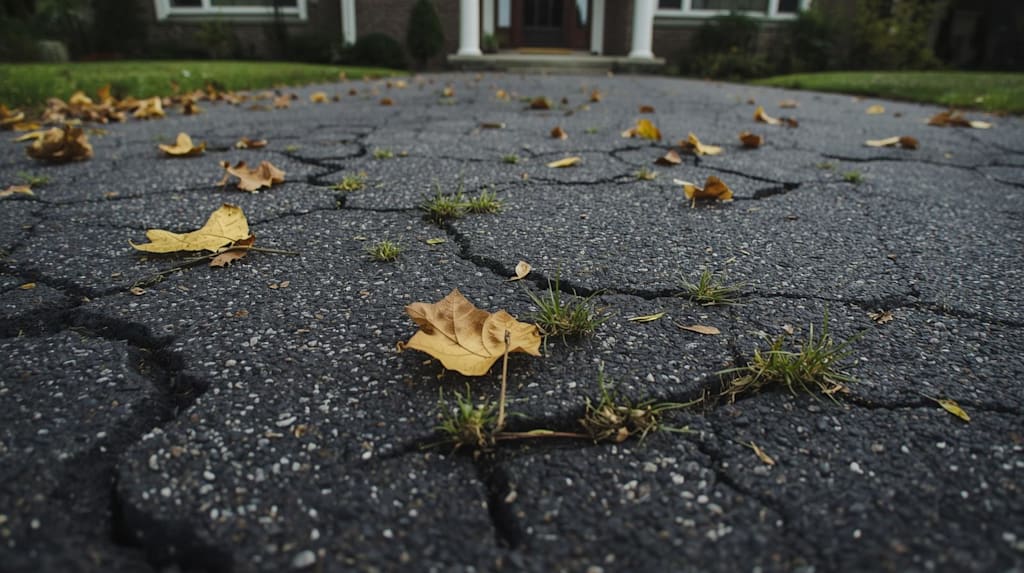
Your driveway isn’t just a pathway to your garage—it’s a critical part of your home’s curb appeal and long-term value. Over time, cracks appear due to weather, heavy vehicles, or soil movement. Left untreated, these cracks can worsen, leading to expensive replacements or even safety hazards.
The good news? Many driveway cracks can be repaired quickly, whether you want to tackle the job yourself or hire a professional. This guide breaks down step-by-step DIY repairs, explains when professional restoration is worth it, and shares tips to prevent cracks from coming back.
Why Driveway Cracks Happen
Understanding why cracks form helps you choose the right repair method. Common causes include:
Temperature changes: Concrete expands and contracts with heat and cold, creating stress fractures.
Ground movement: Soil shifting or settling can leave gaps in the surface.
Heavy loads: Repeated pressure from cars, trucks, or delivery vehicles can create cracks.
Poor installation: Incorrect concrete mixing, insufficient curing, or missing expansion joints accelerate cracking.
Quick check: Hairline cracks are cosmetic and usually easy to patch, while wide or deep cracks may signal structural issues.
DIY Driveway Crack Repair: Step-by-Step
If your cracks are small or medium, you can fix them yourself with a few tools and materials.
Tools & Materials Needed:
- Wire brush or broom
- Shop vacuum
- Caulking gun or trowel
- Concrete crack filler, epoxy, or patching compound
- Putty knife
- Concrete sealant (optional)
- Safety gloves and goggles
1. Clean the Crack
Remove all debris, loose concrete, dirt, and weeds using a wire brush or shop vacuum. Pro tip: Proper cleaning is crucial—dust and debris reduce adhesion and make repairs fail. Surface Rocket’s ROCKET‑VAC system shows the importance of professional-grade cleaning, but a thorough DIY cleanup works well for smaller cracks.
2. Choose the Right Filler
- Hairline cracks (<1/8 inch): Use a high-quality concrete crack filler or epoxy.
- Medium cracks (up to 1/2 inch): Use premixed repair mortar or patching compound.
- Large cracks or gaps: Use concrete caulk or hydraulic cement for structural support.
Always follow manufacturer instructions for curing and application.
3. Fill the Crack
- Apply the filler using a caulking gun or trowel.
- Smooth the surface with a putty knife for an even finish.
- Avoid overfilling, which can crack again as it dries.
4. Let It Cure
- Most fillers require 24–48 hours to cure.
- Protect the area from rain, foot traffic, or vehicles during this time.
5. Seal the Surface (Optional but Recommended)
Applying a concrete sealant after the filler cures adds protection against water, freeze-thaw damage, and UV exposure. This is particularly important in climates with heavy rainfall, hot sun, or freezing winters.
Quick Troubleshooting Tips
- Filler cracks again: Ensure the crack was clean and dry before application.
- Water seeps in during curing: Cover the repair with a plastic sheet.
- Multiple cracks appear: This may indicate underlying structural issues; consider professional evaluation.
When to Call a Professional
Some driveway cracks require professional expertise:
- Wide, widening, or multiple cracks
- Cracks with structural damage or drainage problems
- Cracks that recur after DIY repairs
- Driveways needing resurfacing or full restoration
For homeowners looking for long-term results, working with a professional system makes a measurable difference. Companies like Surface Rocket use multi-layer restoration systems designed to improve adhesion, prevent failure, and ensure the surface performs over time—not just immediately after installation. Professional restoration can save thousands compared to full replacement while improving aesthetics and safety.
Professional Restoration Methods
Professional driveway restoration goes beyond simple crack filling:
- Surface Resurfacing: Thin, durable overlays cover imperfections while enhancing traction and curb appeal.
- Textured Overlay Systems: Multi-layer solutions like ROCKET TOP™ TEXTURE add strength, customizable finishes, and weather resistance.
- Concrete Bonding Primers: Products like ROCKETBOND™ create a high-strength layer that prevents peeling, delamination, or early failure.
These systems ensure cracks don’t return quickly and maintain a smooth, durable driveway for years.
Preventing Future Cracks
Repairing cracks is only part of the solution. Preventive measures help keep your driveway intact:
- Inspect your driveway seasonally for hairline cracks.
- Fill minor cracks immediately before they widen.
- Avoid harsh de-icing chemicals, which erode concrete.
- Maintain proper drainage; standing water accelerates deterioration.
- Limit heavy vehicle traffic where possible or reinforce your driveway.
DIY vs. Professional: Making the Decision
Ask yourself:
- Are the cracks small and isolated? → DIY is cost-effective.
- Are cracks large, structural, or recurring? → Professional restoration is safer and more durable.
- Do you want long-term results and improved curb appeal? → Professional multi-layer systems guarantee performance and longevity.
Cost & Time Considerations
Repair Type Approx. DIY Cost Professional Cost Time to Complete
Hairline cracks $10–$30 $50–$150 30–60 min
Medium cracks $20–$50 $200–$500 1–2 hrs DIY, 1 day pro
Large cracks / resurfacing $50+ DIY risk $1,500–$5,000 Days for pro, high failure risk DIY
Providing cost ranges helps homeowners plan and reduces hesitation to act.
Final Thoughts
Driveway cracks don’t have to be permanent eyesores. With proper materials, careful prep, and attention to detail, small cracks can be repaired effectively by most homeowners. For larger, recurring, or structural issues, professional restoration ensures your driveway is safe, durable, and visually appealing for decades.
Remember: Why replace when you can restore? Acting now prevents more costly repairs later and protects the value of your home.
Have you repaired a driveway crack yourself, or hired a professional? Share your experience in the comments below!
Related Post: how do I choose the right concrete restoration service?
About the Creator
Neck Akila
My specialty is combining research-backed strategies to create marketing copy that resonates with readers and drives conversions
Keep reading
More stories from Neck Akila and writers in Lifehack and other communities.
how do I choose the right concrete restoration service?
When it comes to maintaining the integrity and aesthetics of your concrete surfaces, the choice of a concrete restoration service is critical. Whether it's a driveway, patio, or commercial space, various factors can contribute to the deterioration of concrete, including weather exposure, heavy foot traffic, and improper installation.
By Neck Akila24 days ago in Lifehack
How the Travel Habit That Makes a CEO Better Shapes Smarter Leadership
Leadership is not built by staying in one place. It grows through experience, change, and learning. One of the most powerful ways to grow as a leader is through travel. The travel habit that makes a CEO better is not about taking breaks from work. It is about gaining new insights and building a stronger mindset. Many successful CEOs use travel as a tool for growth. They explore new places to understand how the world works. This helps them become better decision-makers. Travel allows a CEO to step away from routine thinking. It gives them a fresh view of challenges and opportunities. When a leader sees how others live and work, they learn valuable lessons. These lessons shape better strategies and actions. Over time, travel becomes a habit that improves leadership skills. It builds confidence, awareness, and clarity. This is why travel is not just a choice. It is a smart move for any CEO who wants to grow.
By Darrell Hulseyabout 3 hours ago in Lifehack
How Creators Are Changing Storytelling in the Digital Age
The digital age has created new ways for creators to tell their stories which result in a massive creative outbreak that traditional media platforms never predicted. Creators now have the ability to share their stories with people around the world because the internet enables them to reach audiences without needing approval from publishers and film studios and news organizations. Storytelling has become accessible to everyone which has changed our content consumption patterns because it enables new methods of storytelling.
By Shazad Khan7 days ago in Lifehack
Earrings
April truly is the cruelest month, especially in Augusta during the first full week, breeding dogwoods and azaleas into dreams of a green jacket on Sunday. I won’t go into it about badges; suffice to say my family received. I was dating some loser the year I was twenty-two or -three, and I was taking him to the Par 3. At least I was until the night before.
By Harper Lewisa day ago in Writers


Comments
There are no comments for this story
Be the first to respond and start the conversation.